Ajay Walia Photography Blog
By Ajay Walia - 31 May 2020
Online design promoting is the place workmanship meets investigation. What's more, when style and business cross, it's essential to recall that they are reciprocal powers. You don't need to forfeit style to spreadsheets, nor must you overlook information during a photograph shoot.
Online design marketing comes down to two primary parts: styling and item photography. The outcome? Wonderful item pictures that will exhibit your item and increment deals.
To guarantee you have the most ideal internet business pictures, you should begin with an arrangement. Clothing photography is significantly something other than point and snap. Experts go through hours on a web based business photography studio arrangement alone and follow a procedure completely through after creation picture altering to distributing on the web. On the off chance that you need clothing pictures that are both excellent and successful at producing deals, you ought to follow these seven prescribed procedures.
1. Set up the Garment
You need your items to put their best self forward so you can grandstand them to clients. Tragically, attire can get wrinkled, wrinkled and even start to look worn from capacity and transport. Some of the time, apparel tests are gotten in old, worn out or even incomplete conditions.
Planning articles of clothing to be shot is a significant beginning stage for capturing attire, but many clothing picture takers skirt this progression and want to depend on Photoshop to fix wrinkles, stains and different mix-ups gathered while putting away or shipping the item. Nonetheless, Photoshop isn't enchantment — it requires some investment and aptitude to ace propelled altering strategies, and all alters that you make are "ruinous" to the picture, trading off picture quality. Photoshop is an extraordinary apparatus to include last contacts and shading amendment to your pictures, yet don't let it become a support.
It's critical to altogether analyze your item start to finish, all around. Are there any labels or stickers that should be expelled? Has the item gotten wrinkled or wrinkled during stockpiling? Utilize the assets that are accessible to you to fix different harms and interruptions that you may go over. Specifically, build up rollers and tape are incredible for expelling residue and strings from textures.
At times, tests aren't right upon appearance because of a minute ago structure changes (for example fit, hues, designs, and so forth.). Ensure that you comprehend configuration changes for each piece of clothing so you can alter the example in like manner in Photoshop or settle on the choice to stand by to photo the genuine example that will be sold.
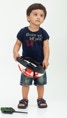
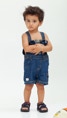
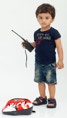
2. Utilize a Mannequin or Live Model
Many attire picture takers disregard the significance of conveying shape and fit to clients by shooting pieces of clothing being worn by mannequins or live models. Rather, they just lay apparel level or photo it on holders. This is an immense design marketing botch.
Shooting a piece of clothing on a mannequin or a live model is maybe the most ideal approach to grandstand that article of clothing's shape and urge clients to picture themselves wearing it.
While models make dress wake up, a mannequin is the following best thing for a photograph shoot on spending plan or exacting time restrictions. Permitting the client to see the shape and regular hanging of every item will give them a practical thought of how the article of clothing will fit on them — also a more excellent shopping experience. A touch of styling can go far toward viably promoting pictures, as well. On the off chance that your piece of clothing is by all accounts too enormous for your mannequin, have a go at fitting it closer to your mannequin by sticking it and tucking your article of clothing with the goal that it is styled to fit appropriately.
Shooting your items on mannequins additionally permits you the chance to make an expert after creation procedure called the phantom mannequin impact. With Photoshop and a tad of arranging, this impact permits you to take various photos of an item on a model or mannequin and afterward consolidate the photographs to evacuate the model or mannequin in after creation handling. The outcome is an exact picture that maintains the attention immovably on your item.
3. Give Enough Imagery
A low picture tally is one of the most noticeably terrible design marketing botches you can make. In spite of mainstream thinking, a couple of pictures of every item is essentially insufficient to give clients an exact feel for the nature of your stock. In this manner, it's essential to give clients however much data as could be expected about every item by transferring in any event three pictures for each item — and ideally five to 10. At any rate, show a front, side and back perspective on the item, alongside a detail shot.
Photo however many points of your items as would be prudent. Consider enhancing with close-ups of significant item embellishments, for example, catches, zippers or weaving.
The more pictures of your item that you give, the more the client will come to comprehend about the item. This will furnish them with a superior shopping encounter and show the nature of your items, just as guarantee that the client is fulfilled when the item shows up, decreasing returns and setting aside you cash.
4. Utilize Enough Light
Try not to be that web based business retailer whose item pictures look dirty and underexposed. Brilliant lighting ought to be probably the greatest need when you begin testing photographs. Guaranteeing that you uncover pictures effectively will exhibit items' hues and different subtleties precisely, just as cause your stock to show up perfect and expert.
All apparel is extraordinary and having the correct lighting will permit clients to welcome the one of a kind features of your pieces of clothing. Abundant lighting likewise permits your camera to create more excellent pictures with less "commotion" or "grain" and more sharpness.
The most ideal approach to guarantee that you have adequate lighting is to lease counterfeit lighting gear. In any case, in the occasion that leasing gear isn't in your financial plan, take a stab at utilizing regular light from an enormous window and a reflector board produced using froth board or test out one of our example arrangements.
5. Utilize the Correct Camera Settings
On the off chance that your camera settings aren't right, at that point no measure of Photoshopping ability will have the option to make your pictures look proficient. DSLR cameras can create photos of incredibly high caliber, however mistaken settings can be negative. Ensure that you comprehend ISO, opening and white equalization before you photo your items. Plan on utilizing your cell phone rather than a DSLR? We have you secured as well.
ISO Definition
To put it plainly, ISO quantifies how touchy your camera's sensor is to light. Ensure that your ISO is no more prominent than 600-640. Higher ISOs produce diverting "clamor" or "grain," which are grayish or hued spots that make photos look more filmic. The higher you go, the more terrible the commotion will be. More than that, at higher ISOs, pictures start to look delicate. Utilizing a tripod will permit you to save your ISO at 100 or 200 for ideal clearness and sharpness.
Good Picture without Noise at lower iso 100-400
Bad Picture
with Noise at
higher iso 1000-32000
Opening Definition
Opening, which is spoken to by the F number on your camera settings (for example f/16, f/2.8), controls the amount of your subject is in center. For the most part, the bigger the gap number, the more parts of the picture will be in full core interest. In our above model, a greater amount of the piece of clothing is more honed at f/22 than it is at f/3.5. All in all, particularly on the off chance that you are utilizing a tripod (suggested) try to set your gap higher than f/11; this will take into account all parts of your items to be in finished core interest. Your optimal opening relies upon good ways from the item, be that as it may. Along these lines, on the off chance that you aren't utilizing a tripod and are changing good ways from the item regularly, this may should be corrected
White Balance Definition
White equalization alludes to the shading cast of the picture. The shading cast of a picture is ordinarily a flimsy layer of undesirable shading, influencing the entire of the picture.
Orange and red tones are for the most part alluded to as being hotter, with purple and blue shades as cooler. The shading cast of a picture relies upon the light source being utilized and the camera's white equalization setting, which controls how the camera deciphers the hues that it records. There are a wide range of sorts of light sources, however the most well-known are tungsten, fluorescent, LED and common daylight.
You can set your white parity as per the kind of light source that you are utilizing or set your white parity to AUTO and let the camera choose. Whatever you pick, remember about white parity or you may get yourself unable to attempt to reproduce precise hues in Photoshop.
6. Set the Correct Color Space Profile
Many clothing picture takers overlook or don't think about the vital advance of changing over altered item pictures into a web-prepared shading space profile. Shading space is a particular scope of hues that can be introduced in a given picture. A few alternatives for shading spaces are Adobe RGB, CMYK and SRGB. Without the right shading space, shades of items will look very surprising when seen on various PC screens, internet browsers and even sites.
SRGB is the best shading space profile to keep your pictures steady and dynamic between the different screens, programs and locales. You can decide to set your camera to SRGB, in this manner dispensing with the additional progression of changing over the record to SRGB after you alter it. Be that as it may, SRGB catches a smaller scope of hues than your camera's RGB default, such a significant number of experts decide to make the transformation simply after they have idealized their pictures to abstain from constraining their altering limit.
7. Alter Properly
Consistency is critical to marketing clothing item pictures, particularly concerning trimming, arrangement, shading and foundations withing your picture altering devices. To keep all pictures steady corresponding to each other and decrease your post-handling time, just as save money on your promoting financial plan, make a point to build up a standard arrangement of determinations for both shooting and altering.
Arrangement
Ensure that your items are no different size and are focused inside your picture with the goal that the entirety of the points, corners and edges of your items line up according to each other. Having a reliably adjusted stock will completely support the intrigue of your site and items.
The least demanding approach to guarantee that your arrangement is right on the money is to make rules in a Photoshop layout.
Editing
Correspondingly to arrangement, it is basic that you crop item pictures indistinguishably in order to give the client a consistent web based shopping experience.
On the off chance that you use rules for arrangement, at that point editing reliably and estimating pictures as per your site's picture determinations ought to be no issue.
Foundations
Some internet business organizations pick various foundations to show various items. In spite of the fact that this may appear to be irrelevant, keeping the entirety of your item pictures steady according to each other can definitely improve the polished methodology and intrigue of your site, also, shave off after creation time. It is commonly settled upon that white or light dark foundations are the most engaging.
Hues
Another regular error in clothing photography is incorrectly speaking to pieces of clothing's hues. Despite the fact that the camera works admirably making genuinely exact shading in the event that you permit it to choose white offset for itself with AUTO mode, a few hues —, for example, neons, reds and pinks — are hard to photo accurately in camera and regularly should be changed in Photoshop.
Off base portrayals of hues can leave clients disappointed and disappointed, so taking a couple of additional minutes to guarantee the shades of your articles of clothing are precise before you transfer them to your site is a smart thought. Basically you need the client to see precisely what they will get via the post office should they request your item.
There are various approaches to change hues, so become more acquainted with Photoshop's contributions and pick your preferred apparatus. Keep in mind, after you have fixed the hues, convert your pictures into SRGB configuration to ensure that various programs, PC screens and sites won't change the exact hues that you endeavored to make for your clients.
Enhance Your Workflow
With these seven prescribed procedures for online design marketing, you have the chance to streamline your work process and make lovely item pictures for your clients.
There's in every case more to learn, from acing profundity of field to low financial plan cell phone photography to utilizing design photography to make your image stick out, however everything expands on this regular establishment. With these accepted procedures and cautious arranging, you currently can start advancing your item photography and harvesting higher ROI from your promoting spend.